
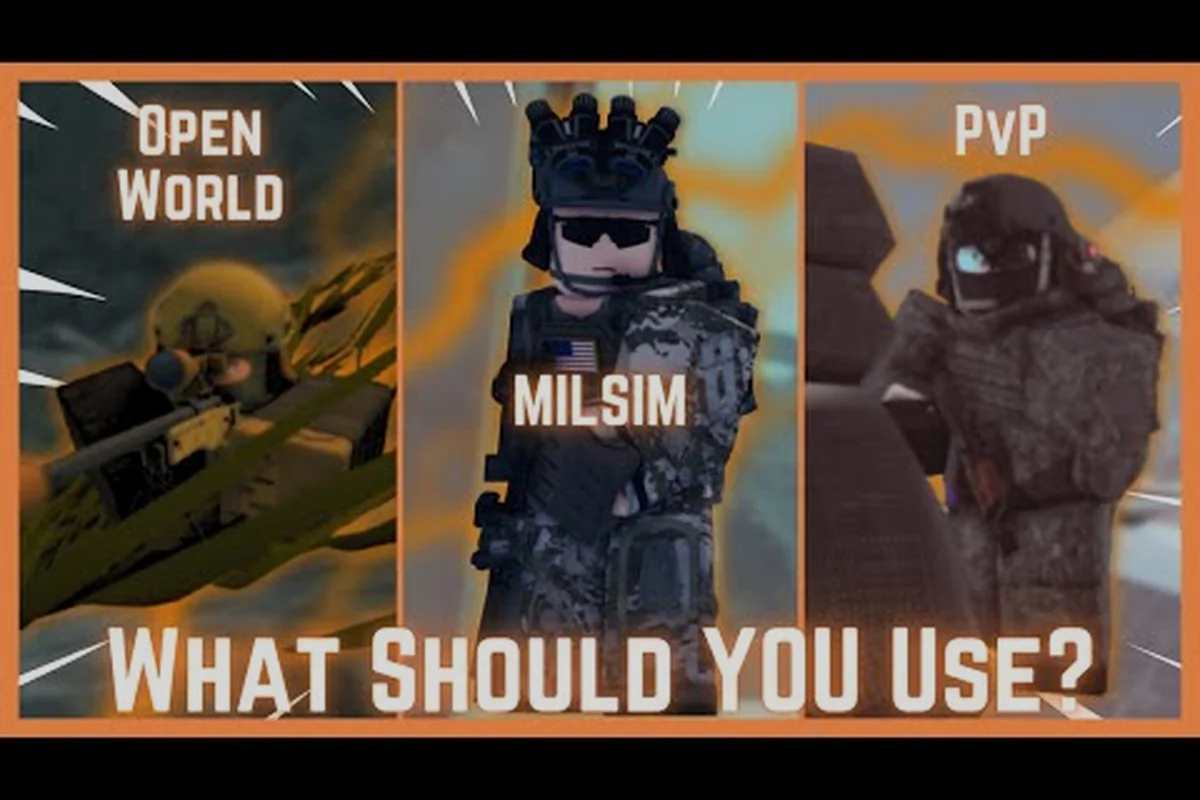
A solid brm5 gear setup is the difference between fumbling with a stock rifle and walking into a compound with every attachment slot doing real work. In Blackhawk Rescue Mission 5, the gear screen hands you a wide grid of rails, sights, grips, muzzle devices, and a backpack slot for a launcher or specialty tool, and every one of those slots can be filled independently of the others.
This guide breaks down how to approach your brm5 attachments for loadout choices so the rifle, sidearm, and launcher all complement each other instead of fighting over the same role. Community testers and longtime operators on the BRM5 Beginner Guide Video repeatedly stress that the best builds are not copy-pasted from a tier list — they are stitched together from a clear role, a known engagement distance, and a few non-negotiable upgrades. Read on for the full breakdown.
For community-tested answers, the discussion thread below is the most detailed source: the r/BlackhawkRescue community threads about brm5-gear-setup.
Core Slot Layout and Attachment Philosophy
Before picking parts, it helps to understand the layout the game gives you. Each primary weapon in Blackhawk Rescue Mission 5 exposes a fixed set of attachment points: optic rail, side rail, top rail, muzzle, and a magazine well. Secondary pistols have a smaller set, usually limited to optic and muzzle, while launchers get a single underbarrel or backpack mount. The brm5 gear setup you build in the lobby is saved per operator, so you can keep several pre-made roles ready to swap in mid-mission.
The Five Core Attachment Families
| Family | What It Covers | Typical Slot | Effect on the brm5 Gear Setup |
|---|---|---|---|
| Optics | Red dots, holographic sights, low-power and high-power scopes | Top rail | Controls target acquisition and identification at range |
| Muzzle Devices | Suppressors, flash hiders, compensators, muzzle brakes | Barrel tip | Shapes recoil, muzzle flash, and sound signature |
| Grips and Stocks | Vertical grips, angled grips, adjustable stocks | Side rail / stock | Improves handling during sustained fire and transitions |
| Magazines and Ammunition | Extended mags, different ammo types, tracers | Magazine well | Affects reload cadence, capacity, and terminal performance |
| Utility and Launchers | Grenade launchers, shotgun underbarrels, flares, mines | Underbarrel / backpack | Adds a second engagement option without dropping the primary |
Most operators spread upgrades across all five families rather than stacking one. A red dot plus a suppressor and a vertical grip already covers about 70% of close-quarters missions; the remaining slots are filled based on the map and squad role. Players familiar with the BRM5 Best Primary Weapon Video often note that the same L85 or M4A1 feels like a different weapon when its optic, muzzle, and grip are aligned with a specific role.
Budget vs Endgame Tiering
Not every attachment lives at the same price tier, and the brm5 attachments for loadout system exposes that ladder clearly. Lower-tier parts are cheap, unlock fast, and serve as a training ground for newer operators. Higher-tier parts cost more, require specific side missions, and often unlock global stat bonuses once you finish a research tree.
| Tier | Cost Range | Unlock Path | Role in the Build |
|---|---|---|---|
| Standard | Low | Available from the armorer on day one | Functional placeholders, good for early operators |
| Improved | Medium | Reward from early contracts and PvE missions | First "real" upgrades, most operators stop here |
| Advanced | High | Requires reputation with a faction vendor | Noticeable handling and recoil gains |
| Elite | Very high | Late-game contracts or PvP ladder rewards | Top-of-tree performance, often paired with unique cosmetics |
A practical brm5 gear setup rule is to keep the rifle on Improved optics and muzzle, push one slot — usually the grip or magazine — into Advanced, and only chase Elite parts once the operator's base role is locked in. Speccing into four Elite slots at once tends to leave the rest of the squad under-equipped.
Optics Choice and Sight Picture
The brm5 optics choice is the single most impactful attachment decision you make, because changing the optic changes the entire feel of the rifle. Optics in BRM5 are not purely cosmetic zoom upgrades — they affect aim-down-sights speed, peripheral vision while aiming, and the way the weapon's recoil behaves at the start of a burst.
Red Dots and Holographic Sights
Red dots and holo sights are the default pick for close-to-medium work, and they form the backbone of most CQB-oriented brm5 primary secondary combo setups. The sight picture is wide, the dot is clean, and target transitions stay fast. Inside 50 meters, a good red dot is almost always the right answer, especially on shorter barrels where the rifle is meant to be swung quickly between targets.
A holographic sight is a slight variant: slightly larger window, a visible reticle pattern, and a small bonus to peripheral awareness while aiming. The trade-off is a touch more visual noise, which can be distracting on bright maps. Many operators prefer the holo for urban and indoor maps and the red dot for mixed terrain.
Low-Power and High-Power Scopes
When engagements stretch past 75 meters, the brm5 optics choice shifts toward magnified optics. Low-power scopes (around 1x-4x) are the most flexible option because they let you drop back to a 1x reticle for close work and crank the magnification up for longer lanes. High-power scopes (6x and above) are specialist tools: they shine on designated marksman builds, overwatch positions, and PvP holdouts, but they punish operators who need to fight in tight corridors.
A common mistake is mounting a 6x scope on a short-barreled rifle meant for room clearing. The aim-down-sights penalty outweighs the magnification benefit, and the brm5 attachments for loadout you spent hours unlocking sit unused. Match the optic's strength to the rifle's role, not the other way around.
Sight Trade-Offs at a Glance
| Optic Type | Best Engagement Range | ADS Speed | Peripheral Vision | Recommended Role |
|---|---|---|---|---|
| Red Dot | 0-50 m | Very fast | Excellent | CQB, indoor raids, breach-and-clear |
| Holographic | 0-60 m | Very fast | Very good | Urban maps, mixed CQB and street fights |
| Low-Power (1x-4x) | 25-150 m | Medium | Good | Designated marksman, flexible overwatch |
| High-Power (6x+) | 100 m and beyond | Slow | Limited | Long lanes, PvP hold angles |
A useful trick is to keep two optics in your inventory: a red dot for the most common missions and a low-power scope for contracts that feature long sightlines. Swap based on the briefing, not on habit. Pairing the red dot with a brm5 primary keeps ADS snappy for doorways and stair pushes, while the 1x-4x low-power scope slots cleanly onto a brm5 weapon combo such as a marksman rifle backing your AR. Check the contract's map callouts for tagged 80 m+ lanes or rooftop overwatch before you commit; if the briefing emphasizes close-quarters raids, the holo is the safer pick.
Primary and Secondary Weapon Combos
The brm5 primary secondary combo is where the build comes together, because the rifle defines the main engagement profile and the sidearm covers the gaps the rifle cannot. A common rookie mistake is to build two long-range weapons and then get caught in a stairwell with no good answer. The cure is a clear role split between the two slots.
Choosing a Primary
Primary weapons in BRM5 cluster into three practical families: 5.56 rifles (L85, M4A1, HK416), 7.62 battle rifles (FAL, G3), and shorter-platform carbines and SMGs (MK 18, MP7). Each has a different strength curve, and the right pick depends on the missions you run most often. A Reddit thread compiling weapons and attachments in BRM5 shows that most experienced operators own at least one rifle from each family and rotate based on the contract type.
| Primary Family | Strength | Weakness | Best Maps | Typical Optic |
|---|---|---|---|---|
| 5.56 Rifle | Low recoil, fast follow-up shots, large magazine | Lower per-shot damage | Mixed terrain, urban, suburban | Red dot or low-power |
| 7.62 Battle Rifle | Hard-hitting, accurate at long range | Heavier recoil, smaller magazine | Open fields, mountain compounds | Low-power or high-power scope |
| Carbine / SMG | Very fast handling, excellent in close quarters | Limited range, armor concerns | Indoor raids, tight urban blocks | Red dot or holo |
Choosing a Secondary
The secondary should be the opposite of the primary in role, not a smaller version of it. If the primary is a 5.56 rifle with a low-power scope, the secondary should be a compact pistol or PDW that handles tight corners. If the primary is a 7.62 battle rifle tuned for long lanes, the secondary should be a fast-firing sidearm that lets the operator pivot to close range without swapping the entire kit.
This is also where the brm5 primary secondary combo starts overlapping with the launcher slot. Some operators choose a compact sidearm plus a shotgun sidearm — the sidearm handles threat response, the "second secondary" acts as a heavy-hitting CQB tool. The game does support dual sidearms in certain operator classes, and the brm5 attachments for loadout on those pistols benefit from a suppressor and an extended magazine, which keeps the optic slot free.
Three Reliable Combo Templates
| Combo | Primary | Secondary | Launcher | Intended Mission |
|---|---|---|---|---|
| All-Round Operator | 5.56 rifle with red dot and suppressor | Standard sidearm with extended mag | Flashbang or smoke | Most PvE contracts, mixed urban maps |
| Designated Marksman | 7.62 battle rifle with low-power scope | Compact PDW or SMG | Armor-piercing launcher | Long-lane overwatch, PvP holdouts |
| Breach Specialist | Carbine with holo and compensator | Shotgun sidearm | Breaching launcher or shotgun underbarrel | CQB, hostage rescue, indoor raids |
These three combos cover roughly 80% of the missions in the live game. Operators who want more variety can mix and match, but staying within these templates until the rifle's handling feels natural is the fastest way to build muscle memory.
Launcher Loadout and Utility Slot
The brm5 launcher loadout is the most misunderstood slot in the gear screen, because launchers in BRM5 are not simply "more damage." They are utility tools whose value depends on the mission briefing. A launcher can be the difference between a clean breach and a stalled operation, but only if the rest of the kit is built around its role.
Launcher Types and Their Real Use
| Launcher Type | Primary Use | Best Paired With | Common Mistake |
|---|---|---|---|
| Grenade Launcher (HE) | Area denial, clustered enemies | 5.556 rifle with red dot | Firing into single targets at long range |
| Smoke Launcher | Cover for revives, repositioning, breach cover | Marksman rifle or DMR | Throwing smoke into open fields with no cover to move to |
| Flashbang Launcher | Disorienting hostiles before a breach | CQB carbine and sidearm | Using it on outdoor maps with spread-out enemies |
| Breaching Launcher | Opening locked doors, destructible walls | Any rifle with reliable close-range option | Saving it for later instead of using it on the first obstacle |
| Armor-Piercing Launcher | Heavy armor, light vehicles | Battle rifle with scope | Wasting it on unarmored infantry at close range |
A good rule of thumb is to treat the launcher as a mission-specific tool. Many operators keep a flashbang or smoke launcher as their default and only swap to a breaching or HE launcher for specific contracts. The brm5 launcher loadout you bring to a stealth hostage rescue is very different from the one you bring to a fortified compound assault.
Synergy With the Rest of the Kit
The launcher works best when the rest of the brm5 gear setup is already solved. If the primary has a clear role and the secondary covers the gap, the launcher adds a third option that is genuinely useful rather than redundant. A typical example: a marksman with a 7.62 rifle and a compact PDW benefits enormously from a smoke launcher, because smoke gives the operator time to reposition between long shots. The same operator with a breaching launcher instead would have a tool that rarely fires, because most of their targets are visible from the overwatch position.
For operators who want a more flexible setup, a shotgun underbarrel is a strong alternative to a dedicated backpack launcher. It keeps the primary platform compact, adds a real CQB option without a second weapon swap, and frees the backpack slot for extra ammunition or medical supplies. This hybrid approach is a common midpoint between a pure rifle build and a full brm5 launcher loadout.
Putting It All Together: Three Reference Builds
To make the theory concrete, here are three reference builds that combine the choices above. Each one is built around a clear role, uses a consistent brm5 optics choice, and pairs the primary with a complementary secondary and launcher. Operators can copy these directly or use them as starting points for personal tweaks. e the choices above. Each one is built around a clear role, uses a consistent brm5 optics choice, and pairs the primary with a complementary secondary and launcher. Operators can copy these directly or use them as starting points for personal tweaks, then refine them further by consulting our Brm5 Loadout Examples guide for additional role-by-role configurations and tuning notes.
Build 1 — The Steadfast Rifleman
This brm5 gear setup is calibrated as a general-purpose loadout that clears roughly 80% of PvE contracts without modification, relying on the L85 or M4A1's predictable recoil and a suppressor to keep engagements off the minimap. Because every attachment slot defaults to a low-skill, high-reliability pick — red dot optic, vertical grip, standard mag, suppressed sidearm, and smoke launcher — operators can chain revives, reposition under cover, and respond to close-range threats without breaking tempo. The real value is that it teaches the BR-M5 platform's handling and bullet drop before players graduate to specialized roles, making it the safest baseline for learning both weapon-specific recoil patterns and the optic choice fundamentals that later builds assume.
| Slot | Attachment | Reason |
|---|---|---|
| Optic | Red dot | Fast target acquisition, wide sight picture |
| Muzzle | Suppressor | Keeps the operator off the minimap, fits stealth contracts |
| Grip | Vertical grip | Tames recoil during sustained fire |
| Magazine | Standard or slightly extended | Reliable capacity, no penalty to handling |
| Secondary | Suppressed sidearm with extended mag | Quiet threat response at close range |
| Launcher | Smoke launcher | Cover for revives and repositioning |
This brm5 gear setup is intentionally forgiving, producing a sub-2-second TTK against standard AI at optimal range while staying under the audio detection radius thanks to the suppressor. Because the L85 and M4A1 both top out at roughly 700 RPM with predictable upward climb, new operators can complete the Night Raid and Bridge Defense tutorials without triggering cross-map reinforcements, and the smoke launcher covers revive windows during the Breach phase where most early squads wipe. Treat it as the benchmark that every later brm5 attachments for loadout variant is measured against before swapping to the marksman, breacher, or anti-vehicle specializations.
Build 2 — The Designated Marksman
Designated Marksman Build 2 leans into the brm5 primary secondary combo as its loadout identity — pairing the BRM-5's 7.62 battle-rifle profile with a compact PDW so the operator can hold long sightlines overwatch lanes and then pivot into CQB when a flank breaches the 20-meter mark. Because the BRM-5 already delivers reliable hits at 75m+, the secondary only needs to cover the 0–20m window, freeing the primary to specialize in magnification optics and a precision stock. The result is a versatile brm5 gear setup that scales across overwatch, defense, and respawn modes.
| Slot | Attachment | Reason |
|---|---|---|
| Optic | Low-power (1x-4x) scope | Magnification for long shots, 1x reticle for close work |
| Muzzle | Muzzle brake or compensator | Reduces recoil for accurate long shots |
| Grip | Angled grip or precision stock | Improves control during slow, deliberate fire |
| Magazine | Standard | 7.62 magazines are already small; extended mags hurt handling |
| Secondary | Compact PDW | Fast close-range response if a flank develops |
| Launcher | Armor-piercing launcher or HE | Softens fortified positions or light vehicles at range |
This brm5 gear setup rewards map knowledge and disciplined positioning over raw aim, since the 7.62 BRM-5 loses duels in corridors shorter than 10m where its 4x optic forces an awkward hold. That is exactly why the secondary slot is locked to a compact PDW rather than another long-range weapon — a second precision rifle would duplicate the 75m+ coverage the BRM-5 already owns, leaving the 0–20m flank window unaddressed. Run a smoke grenade alongside the HE launcher to cover the pivot, and you can suppress a contested choke while the PDW hip-sprays into the breach.
Build 3 — The Breach Specialist
The Breach Specialist is a CQB-oriented brm5 attachments for loadout purpose-built around the weapon's high cyclic rate and manageable vertical recoil, channeling both into the kind of controlled, room-clearing spray that indoor raids and hostage rescue demand. Because most indoor maps in the brm5 gear setup meta feature sub-15-meter engagement windows and destructible entry points, every attachment slot in this build is biased toward mobility and immediate target acquisition rather than long-range accuracy. The result is a loadout that sacrifices mid-range versatility for raw entry speed, letting a solo operator or two-man fireteam clear multi-room complexes with the breaching launcher as the opening move.
| Slot | Attachment | Reason |
|---|---|---|
| Optic | Holographic sight | Wide window for fast sweeps in tight rooms |
| Muzzle | Compensator | Controls muzzle rise during rapid indoor fire |
| Grip | Vertical grip | Stable platform during short, intense engagements |
| Magazine | Extended magazine | More rounds before a reload in a multi-room sweep |
| Secondary | Shotgun sidearm | Heavy close-range damage without swapping the primary |
| Launcher | Breaching launcher | Opens locked doors and destructible walls on the first try |
The Breach Specialist is intentionally a niche brm5 gear setup: it sacrifices everything past 15 meters — the compensator and holographic optic combination cannot stabilize the high cyclic rate at range, and the vertical grip's stabilization bonus drops off sharply beyond close quarters — making it the wrong tool for open maps like Dustline or any sightline-heavy engagement. In a confined mission such as a hostage rescue on the Bazaar map, however, the breaching launcher entry followed by the 50-round extended magazine sweep through connected rooms produces the fastest possible room-to-room clear time, which is why no other brm5 attachments for loadout in this category matches its indoor efficiency.
Fine-Tuning and Common Pitfalls
Even with a solid template, the brm5 gear setup is not a one-time decision. Operators should revisit their attachments after major patches, new contracts, or when they unlock a key piece of gear. The same rifle that felt great a month ago can feel clunky after a recoil change or a new optic enters the loot pool.
Common Mistakes to Avoid
-
Over-stacking recoil control: a suppressor, compensator, muzzle brake, and heavy grip on the same rifle leave very little stat budget for damage or handling. Pick one recoil tool and stick with it.
-
Chasing Elite parts too early: the performance gap between Improved and Elite is often smaller than the price difference. A well-tuned Improved build beats a half-finished Elite build every time.
-
Ignoring the suppressor slot: sound discipline is one of the strongest tools in the game, and the brm5 attachments for loadout include some of the best suppressors in the genre. Underusing them is leaving value on the table.
-
Copying a tier list without context: a build that dominates PvP might be a poor fit for the PvE contracts you actually run. Always cross-check the role of the build with the role of the mission.
When to Rebuild From Scratch
There is no shame in tearing down a brm5 gear setup and starting over. The game makes it cheap to experiment once an operator is past the early reputation grind, and most experienced players cycle through several complete loadouts before settling on a permanent kit. The trigger to rebuild is usually one of three events: a major balance patch changes recoil or damage values, a new weapon is unlocked that fits a role better, or the operator's preferred mission type shifts from CQB to long-range engagements.
A practical habit is to keep at least two saved brm5 gear setup presets per operator — one tuned for your most-run contract type, and a second tuned for the opposite engagement profile. Swapping between them takes seconds in the lobby and removes a lot of mid-mission frustration.
Final Notes on the Bigger Picture
The brm5 gear setup system rewards players who think about roles rather than stats. Optics, muzzle devices, grips, magazines, and launchers each carve out a niche, and the strongest builds are the ones that combine a primary, a secondary, and a launcher that all answer different questions. A balanced operator with a red-dot 5.56 rifle, a suppressed sidearm, and a smoke launcher will out-perform a half-baked Elite build on most missions simply because every slot is doing its job.
Once the core templates above feel natural, the next step is to start mixing families — for example, pairing a 5.56 rifle with a shotgun sidearm and a breaching launcher for a hybrid CQB kit, or running a battle rifle with a fast-firing PDW and an HE launcher for overwatch with explosive backup. The exact mix is less important than the principle: every slot should answer a question the other slots cannot. Operators who internalize that rule tend to build loadouts that feel powerful on any map, with any squad, and on any contract the game throws at them.
Frequently Asked Questions
What is the best optic for a general-purpose brm5 gear setup?
A red dot is the strongest default optic because it gives a wide sight picture and very fast target acquisition, which covers most engagement ranges in PvE contracts. Players who frequently take long-lane overwatch positions often swap to a low-power 1x-4x scope, but the red dot remains the safer choice until the operator knows the maps well.
Should I always run a suppressor on my primary?
A suppressor is one of the strongest brm5 attachments for loadout because it keeps the operator off the minimap and supports stealth play, but it is not mandatory on every contract. Loud builds with a compensator and extended magazine are competitive on breach-and-clear missions where stealth is not a priority, and they often handle crowds faster.
How do I pick a good brm5 primary secondary combo?
Start by giving the primary a clear role — close-quarters, mid-range rifle, or long-lane marksman — then choose a secondary that covers the gap. A 5.556 rifle pairs naturally with a compact PDW or shotgun sidearm, while a 7.62 battle rifle pairs better with a fast sidearm or SMG. Avoid building two weapons that solve the same problem.
What goes in the brm5 launcher loadout for PvP?
Smoke and flashbang launchers are the most consistent picks in PvP because they create openings and cover without requiring direct hits on armored targets. HE launchers are situational against clustered defenders, and armor-piercing launchers are best saved for vehicles or fortified positions rather than infantry duels.
How often should I rebuild my attachments after a patch?
A good rule of thumb is to revisit the brm5 gear setup after every major patch, and to do a full rebuild whenever a new weapon or attachment enters the unlock pool. Most operators find that two or three full rebuilds per major patch is enough to keep the kit competitive without burning through resources on minor stat tweaks.