
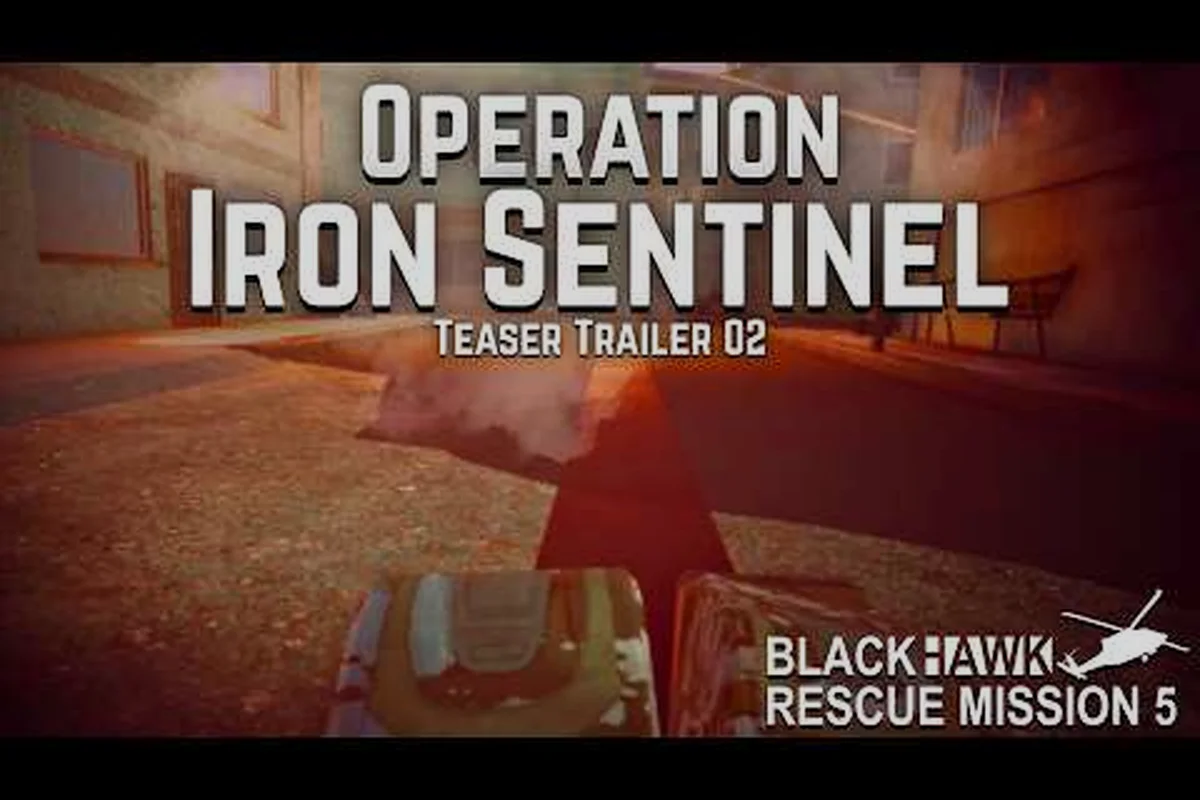
The brm5 mount radar station sits high above the Ronograd valley, and it ranks as one of the most rewarding mountain POIs in Blackhawk Rescue Mission 5 when players run it with a clear route in mind. Between the hardened fort walls, the buried bunker, and the rotating supply drops circling the radar dome, the compound offers layered loot that rewards a slow, structured sweep rather than a frantic rush up the cable car. This guide breaks down the entry path, every key building, the highest-value brm5 loot spots, and the extraction timing that makes the whole run feel worth the climb.
For players who want to experience the full roster of military operations and loadouts that the title offers, the original Blackhawk Rescue Mission 5 title on Roblox serves as the official hub where missions like the radar station are deployed, according to the game's official Blackhawk Rescue Mission 5 page.
For a closer look at this topic, the official video below breaks it down in full: the BRM5 maps video covering brm5-mount-radar-station.
brm5 Mount Radar Station Overview and Why It Matters
The brm5 mount radar station operates as a mid-to-high tier mountain compound that bridges the early valley towns and the high-altitude research zones. It carries a moderate AI patrol density, a couple of named high-value rooms, and a loot density that beats most side compounds once the route is learned. According to community testing, the radar site becomes the preferred farming stop for squads running between the airfield and the northern ridge because it sits almost dead center on the cable car line, so travel time is short once the team holds the compound.
Compound Layout at a Glance
The brm5 mount radar station compound is built across three elevation tiers. The lower service road hosts the parking area and the first guard shack, the mid-tier holds the Radar Operations Fort with its barracks and armory wing, and the upper tier caps out at the Dome Platform where the radar dish rotates above a small underground Radar Bunker. A service tunnel connects the mid-tier armory to the lower parking level, which gives squads a fast fallback route if the upper deck gets hot.
| Tier | Key Structures | Loot Focus | Threat Level |
|---|---|---|---|
| Lower service road | Guard shack, motor pool, two parked vehicles | Common ammo, basic meds, vehicle parts | Low |
| Mid-tier fort | Barracks, armory, command office, kitchen | Weapons, mods, military gear | Medium |
| Upper dome | Radar dish platform, control room | Rare electronics, keycards, schematic pieces | High |
| Underground bunker | Server room, storeroom, escape hatch | Endgame-tier loot, supply drop caches | High |
The mid-tier fort is the safest first stop because the barracks and armory are the most reliable sources of mid-range rifles and ammo, and clearing them first prevents a squad from being shot in the back while it loots the upper dome. The underground bunker is the true payoff, but the entry requires either a keycard looted from the command office or a manual breach through the ventilation shaft on the eastern wall. Both paths are covered later in the route section.
Loot Value Compared to Other Mountain POIs
Players running a rotation between the high-value Ronograd POIs often debate whether the radar site beats the airfield, the monastery, or the northern research base. Based on community-reported run data, the radar station lands in the upper half of mountain compounds for both loot per minute and survival rating, because the layout funnels squads through a tight set of buildings instead of spreading them across a sprawling open campus.
| POI | Average Loot Tier | Loot per Minute | Squad Survival Rating |
|---|---|---|---|
| brm5 Mount Radar Station | High | Strong | Medium-High |
| Ronograd Airfield | Medium | Medium | Medium |
| Sawang Monastery | Medium-High | Slow | Medium |
| Northern Research Base | Very High | Slow | Low |
| Riverside Village | Low | Fast | High |
The combination of high loot tier and a manageable survival rating is what pulls experienced players back to the radar site. It is the only mountain POI in Ronograd that lets a disciplined squad walk out with a full inventory of mid-to-high tier gear in roughly twelve to fifteen minutes, and the supply drop cycle that passes over the dome is one of the most reliable brm5 supply drops in the region.
brm5 Fort, Barracks, and Armory Route
The fort complex is the heart of the brm5 mount radar station and the first place any squad should commit to clearing. The fort structure combines a traditional military outpost layout with modern electronics scattered through the command office, so the loot profile is broader than a standard barracks. The named Radar Operations Fort is where the bulk of the brm5 fort loot lives, and the rooms are tight enough that a two-person team can clear them in under four minutes if they stack door breaches correctly.
Clearing the Barracks Block
The barracks block holds two rows of bunk rooms, a central mess hall, and a small armory cage. Community data suggests the brm5 fort barracks are the most reliable source of mid-range assault rifles on the mountain, and the bunks frequently spawn clothing, food, and basic medical supplies. The mess hall kitchen holds a hidden floor safe behind the freezer that contains a small but consistent cache of valuables, so do not leave the building before checking behind the second shelf on the left wall.
| Room | Likely Loot | Search Tip |
|---|---|---|
| Bunk rooms (×6) | Clothing, meds, low-tier weapons | Check under mattresses and inside lockers |
| Mess hall | Food, water, occasional ammo crate | Hidden safe behind freezer in the kitchen |
| Armory cage | Rifles, body armor, grenade pouches | Requires bolt cutters from the guard shack |
| Corridor desks | Keycards, paper notes, dogtag collectibles | Inspect drawers and bookshelves |
The armory cage cannot be opened without bolt cutters, and the bolt cutters are almost always found either in the lower guard shack or in the mechanic's toolbox near the motor pool. Sending one player ahead to grab the cutters while the other watches the corner is a common squad tactic, because it shaves a minute off the clear compared to running back later. Players tracking the broader brm5 radar station region often compare this loop with other high-value locations detailed in the brm5 map locations overview, and the radar fort consistently ranks in the top three for consistent weapon spawns.
Securing the Command Office and Kitchen Wing
The command office is the single most valuable room inside the brm5 fort. It holds the keycard that unlocks the underground bunker, a desk that spawns rare electronics, and a wall safe that resets every match. The kitchen wing, which connects to the mess hall, contains a back pantry where food, water, and occasional high-value stims spawn, and it has a second exit that drops the squad into the service tunnel running toward the motor pool. This tunnel becomes the emergency extraction path if the upper dome gets overrun.
| Wing | Key Item | Why It Matters |
|---|---|---|
| Command office | Bunker keycard | Unlocks the underground server room |
| Command office wall safe | Cash, rare attachments | Reliable reset loot every match |
| Kitchen pantry | Food, water, stims | Keeps the squad sustained through long clears |
| Service tunnel exit | Fast fallback to motor pool | Escape route if dome patrols push down |
A disciplined squad clears the barracks first, loots the armory cage with bolt cutters, then pushes into the command office to grab the keycard before rotating to the upper dome. Skipping the command office in favor of rushing the dome is one of the most common mistakes new players make, because the keycard is the only guaranteed way into the highest-tier loot room without forcing the vent breach.
brm5 Bunker Location and Underground Route
The brm5 bunker location sits directly beneath the radar dome, and entering it is the main reason most squads climb the mountain in the first place. The bunker holds a server room with rare electronics, a storeroom stacked with end-game attachments, and a third room where one of the brm5 supply drops occasionally caches its payload if the aerial drop vehicle passes over the dome. The bunker is dark, cramped, and patrolled by the most aggressive AI in the compound, so it should only be entered after the fort and dome are fully cleared.
Two Entry Paths Into the Bunker
Players have two realistic entry options into the brm5 mount radar station bunker. The first is the front hatch behind the dome control room, which requires the keycard looted from the command office. The second is the eastern ventilation shaft, which can be manually breached with a breaching charge or a heavy melee hit on the loose grate. Both paths lead into a short corridor that opens into the server room, and the loot from that point onward is identical.
| Entry Path | Requirement | Risk Level | Speed |
|---|---|---|---|
| Front hatch (keycard) | Command office keycard | Low-Medium | Fast |
| Vent shaft (east wall) | Breaching charge or heavy melee | Medium-High | Slow |
| Staircase from motor pool | Optional tunnel access | Low | Medium |
The vent shaft entry is louder, slower, and tends to attract patrols from the upper dome, so it is usually reserved for solo players who cannot afford to detour back down to the fort. Squads running with a keycard almost always take the front hatch because it skips the noise and lands the team directly in front of the server racks. The optional staircase from the motor pool is a hidden third path that connects through the service tunnel, and while it bypasses the radar dome entirely, it also bypasses the brm5 supply drop that frequently lands there, so most players skip it unless the dome is already swarming with patrols.
Server Room, Storeroom, and Escape Hatch
Once inside the brm5 bunker, the layout splits into three rooms. The Server Room runs down the left side and holds rare electronics, keycard-locked lockers, and the highest-value single loot container in the entire compound. The Storeroom branches off the central corridor and contains ammo crates, weapon attachments, and occasionally a high-tier weapon. The Escape Hatch sits at the far end of the corridor and opens onto a cliff ledge that drops down to the lower service road, which is the fastest extraction path if the squad is overburdened.
| Room | Best Loot Type | Recommended Action |
|---|---|---|
| Server room | Rare electronics, keycard lockers, high-tier weapons | Loot the wall lockers first, then the floor crates |
| Storeroom | Ammo, attachments, mid-tier gear | Sort attachments into the squad stash before leaving |
| Escape hatch | Fast extraction to lower service road | Use only if over-encumbered or under heavy pressure |
The server room wall lockers are the single most valuable containers in the brm5 mount radar station. Community data suggests at least one locker in the room will contain a high-tier weapon, attachment, or rare electronic on any given run, and the floor crates underneath the server racks frequently stack additional mid-tier loot. The escape hatch should be treated as a contingency path rather than a primary extraction, because dropping onto the lower service road is slow and exposes the squad to sniper fire from the eastern ridge.
brm5 Supply Drops and the Best Loot Locations
The brm5 supply drop cycle rotates over the radar dome on a predictable timer, and the drops are some of the most valuable brm5 loot spots in the entire Ronograd region. A drop landing on the dome platform is one of the most reliable ways for a squad to walk away with a top-tier weapon or a stack of rare materials without grinding the bunker. Combining the supply drop rotation with the fort and bunker clear is what separates a decent run from an elite one, because the timing lines up well with the mid-point of a normal compound clear.
Supply Drop Rotation and Dome Timing
The supply drop vehicle flies a wide arc around the Ronograd valley, and the brm5 mount radar station is one of its named stop points. The drop usually passes over the dome every twenty to twenty-five minutes during a live session, and the parachute drop lands within a small radius of the radar dish platform. Players standing on the dome when the drop hits get first claim on the container, but the drop also leaves a smaller cache inside the bunker if the squad clears the compound fast enough.
| Drop Phase | What Happens | Best Action |
|---|---|---|
| Inbound (last 2 min) | Drop plane circles the dome | Get to the upper platform and pre-aim the crate zone |
| Landing (0-30 sec) | Parachute deploys over the dish | Hold the platform and crack the crate immediately |
| Aftermath (1-3 min) | AI patrols rush the dome | Loot and rotate to the bunker or extraction |
| Cache inside bunker | Secondary loot if bunker is cleared in time | Check the storeroom floor crate after the dome drop |
The dome platform is exposed, so a squad holding the upper tier during a drop is visible from the eastern ridge and the lower service road. Smokng the crate and rotating to the bunker entrance is a common tactic that lets the team keep the loot without getting picked off. The smaller cache inside the bunker is a hidden bonus that many players miss, because it only spawns when the bunker has already been cleared in the same session, so the timing has to be tight.
Top brm5 Loot Spots Ranked by Value
Across the full brm5 mount radar station compound, certain rooms and containers consistently outperform others. The following ranking is based on community-reported loot data and the typical density of high-tier spawns. It is a useful reference for squads that want to skip the filler rooms and focus on the best brm5 loot locations.
| Rank | Location | Loot Type | Risk |
|---|---|---|---|
| 1 | Server room wall lockers | High-tier weapons, rare electronics | Medium |
| 2 | Command office wall safe | Cash, rare attachments | Low |
| 3 | Dome platform supply drop | Top-tier weapons, materials | High |
| 4 | Bunker storeroom floor crate | Attachments, ammo, gear | Medium |
| 5 | Fort armory cage | Mid-tier rifles, body armor | Medium |
| 6 | Barracks bunk rooms | Clothing, meds, low-tier gear | Low |
| 7 | Guard shack toolbox | Bolt cutters, basic tools | Low |
The ranking above also doubles as a fast-clear priority list. A squad that is short on time should hit the top four rooms in order, then extract through the escape hatch or the service tunnel depending on threat level. The guard shack and barracks can be skipped on a tight run, because the loot there is replaceable in most other compounds around Ronograd. For players who want to compare the radar station's brm5 best loot locations against other mountain POIs, the brm5 best loot locations overview provides a wider ranking of compounds across the entire map.
Entry, Extraction, and Squad Tactics for the Radar Run
The brm5 mount radar station rewards squads that plan their approach before the run starts. A clean cable car approach from the valley town is the most popular entry because it skips the long road climb, but the cable car line is exposed to sniper fire. The motor pool offers a quiet alternative approach, and the service road from the southern ridge gives overland squads a safer first contact. Extraction runs the other way: a full squad usually exits through the cable car, while solo or light squads often prefer the service tunnel and the lower road.
Recommended Three-Phase Route
A reliable three-phase route keeps the squad moving, clears the highest-value rooms in the right order, and lines up the supply drop rotation with the dome push. The phases below are tuned for a two or three-player squad running the compound on a normal difficulty setting.
| Phase | Action | Duration | Goal |
|---|---|---|---|
| Phase 1: Approach and fort clear | Cable car up, clear guard shack, barracks, armory, command office | 5-7 min | Secure mid-tier loot and the keycard |
| Phase 2: Dome and bunker entry | Push to the upper dome, hold for the supply drop, breach the bunker | 5-6 min | Secure the supply drop and bunker loot |
| Phase 3: Loot sort and extract | Sort attachments, stash gear at the motor pool, extract via cable car | 2-3 min | Leave the compound safely with full inventory |
Stashing extra gear at the motor pool before extracting is a small but important habit. The motor pool has a small locker that holds overflow loot between squad members, and it saves a player from being over-encumbered on the cable car descent. For players who want to optimize their vehicle rotation between mountain compounds, the brm5 gunner XP and vehicle loadout guide covers the best transport choices for radar station runs and how to use the supply truck effectively.
Common Mistakes and How to Avoid Them
Most failed runs on the brm5 mount radar station come from the same handful of mistakes. Skipping the command office, rushing the dome before the fort is clear, and missing the supply drop timing are the three most common errors, and each one costs the squad a chunk of potential loot. The mistakes below are the ones that show up most often in community reports, along with the simple fix that prevents them.
| Mistake | What Goes Wrong | Fix |
|---|---|---|
| Rushing the dome first | Squad gets shot from behind by patrols in the barracks | Clear the fort first, then rotate to the dome |
| Forgetting the keycard | Bunker cannot be entered without the vent breach | Always loot the command office before the dome |
| Missing the supply drop | Dome is not held during the rotation | Check the timer and be on the platform two minutes early |
| Looting the motor pool first | Squad is exposed on the lower road | Approach from the cable car or the southern ridge instead |
| Extracting through the bunker hatch | Slow descent, sniper exposure | Use the cable car or the service road for extraction |
A second habit that saves a lot of runs is calling out the supply drop timer in squad chat. The drop rotation is predictable enough that a player can shout a one-minute warning, which gives the rest of the team time to clear the fort and rotate to the dome. Teams that build the callout into their routine report significantly more successful drops than teams that just push the dome and hope for the best.
Loot Priorities and What to Skip on a Tight Run
When time is short, not every container in the brm5 mount radar station is worth opening. The container priority table below helps squads decide what to hit and what to skip during a fast run. Skipping the lower-tier rooms on a tight clear is normal, because those containers respawn frequently and the loot there is not worth the noise penalty.
| Priority | Container | Reason |
|---|---|---|
| Hit first | Server room wall lockers | Highest value per container |
| Hit first | Command office wall safe | Reliable reset loot |
| Hit on time | Dome platform supply drop | One of the best single drops in the region |
| Hit if time | Bunker storeroom crate | Strong attachment pool |
| Skip on tight runs | Barracks bunk rooms | Replaceable in other compounds |
| Skip on tight runs | Mess hall floor safe | Low value relative to the time cost |
A final tip for solo players is to skip the armory cage unless the bolt cutters are already looted. The cage rarely holds anything that justifies a long detour back to the guard shack, and a solo player is better off spending that time on the bunker or the supply drop. Players looking to pair their radar station farming with a strong starter loadout will find a useful weapon breakdown in the brm5 starter weapons guide, which covers the rifles and attachments that perform best on the mountain.
Frequently Asked Questions
Where is the brm5 bunker location on the radar station map?
The brm5 bunker location is directly beneath the radar dome on the upper tier of the compound, and it can be entered through the front hatch behind the dome control room with the keycard looted from the command office. A second entry runs through the eastern ventilation shaft, which requires a breaching charge or a heavy melee hit on the loose grate.
What is the best route for the brm5 fort clear?
Start at the lower service road, clear the guard shack for bolt cutters, then push through the barracks and armory cage before rotating into the command office. Grab the bunker keycard from the command office desk, then continue up to the upper dome to catch the next supply drop rotation.
How often do brm5 supply drops land on the radar station?
The brm5 supply drops circle the Ronograd valley on a roughly twenty to twenty-five minute cycle, and the radar dome is one of the named stop points. Standing on the dome platform with the crate zone pre-aimed is the safest way to claim the drop, and a smaller cache occasionally lands in the bunker storeroom if the compound is cleared before the rotation ends.
What are the best brm5 loot spots to hit on a short run?
On a short run, prioritize the server room wall lockers, the command office wall safe, the dome platform supply drop, and the bunker storeroom crate. The barracks bunk rooms and the mess hall floor safe can be skipped, because their loot is replaceable in other mountain compounds and the time cost usually outweighs the reward.
Can a solo player clear the brm5 mount radar station without a squad?
Yes, but the bunker and the dome are risky for a lone runner. Use the ventilation shaft to skip the keycard requirement, loot the storeroom first, then hold the dome briefly for the supply drop. Extraction should run through the escape hatch or the service tunnel rather than the exposed cable car line, because solo players cannot afford a long exposed retreat.